

Adding Google Analytics to your self hosted Wordpress site is simple with the use of a handy little plugin in called Google Analytics by Yoast!
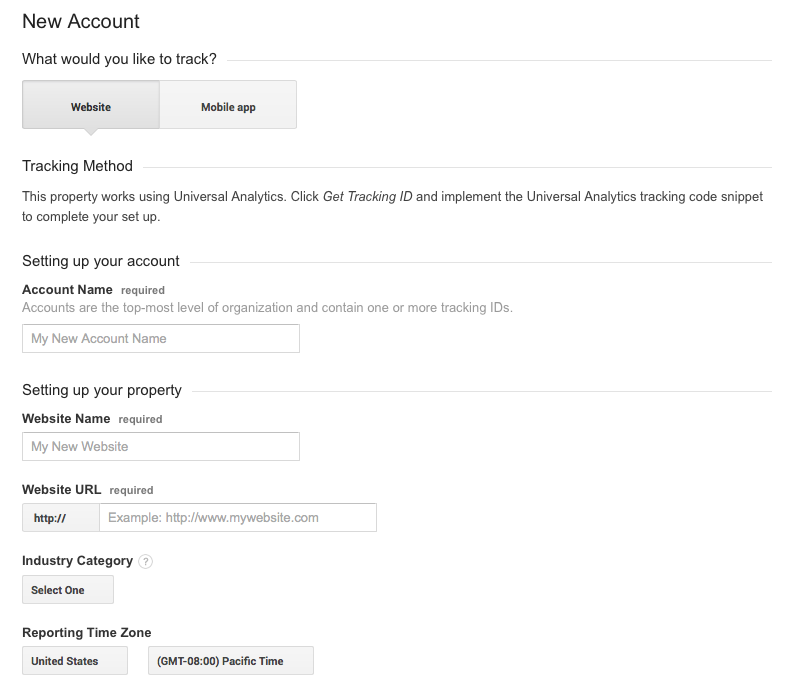
Install the Google Analytics by Yoast plugin by navigating to Plugins > Add New and searching the plugin name. Activate this plugin and then in a new tab, open Google Analytics. Sign up for a Google Analytics account and you should see this page. Fill in your site information and hit Get Tracking ID at the bottom of the page.
You will now see a page that displays your Tracking ID and Tracking Code. Go back to your Wordpress dashboard and on the left panel you'll see the Analytics tab. Click on this and you should see this page:

Click 'Authenticate with your Google account' > a popup will appear, follow the steps then copy and paste the code into the authentication box. Otherwise you can select 'Manually enter your UA code' and enter the Tracking ID number on the Google Analytics page. It will start with the letters UA.
And it's that easy!
It may take a few days to start seeing your data and may also say that it's not installed or not receiving data. Come back 24 hours later and you'll see Status: Receiving Data next to your UA code.
