I am very excited to be sharing all the different ways you can use the Squarespace Image blocks. I had to keep this underwraps for ages when I first heard about it, but it's now been released Squarespace wide, so you can officially start to dream up ways to use this new feature as it will not be far off for you!
Squarespace has just added a variety of different ways to use the Image block and I am super excited, it's actually made my job as a designer easier!!
So in this blog post, I will be showing you the different types and how you can change the way that they look to match your brand.
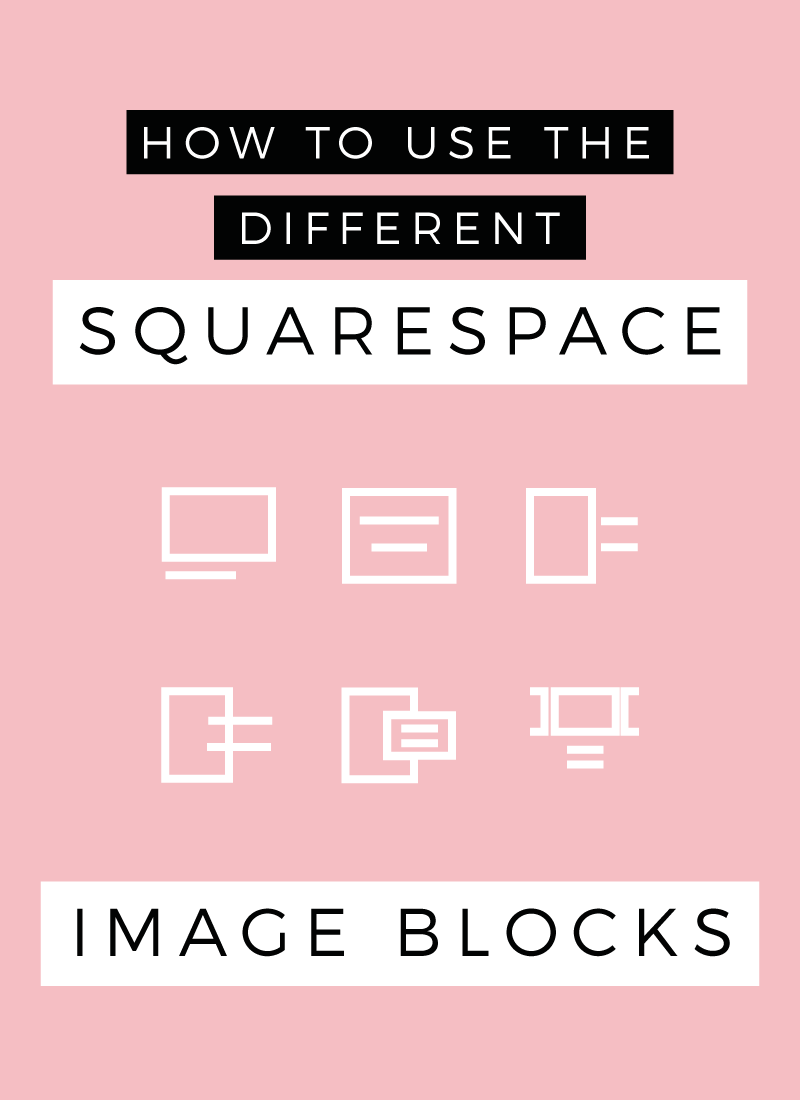
THE IMAGE BLOCK TOOL

The image block tool in Squarespace now looks different. When you add in an image block you are now given a two page options panel. On the first page: Content, you will be able to upload your image and make it a link if you like, then on the second page: Design, you'll be able to select what kind of format this image should take. The Inline option is your normal, average image insertion option, so we wont go over that one right now. The others are where it gets new and exciting!
THE POSTER
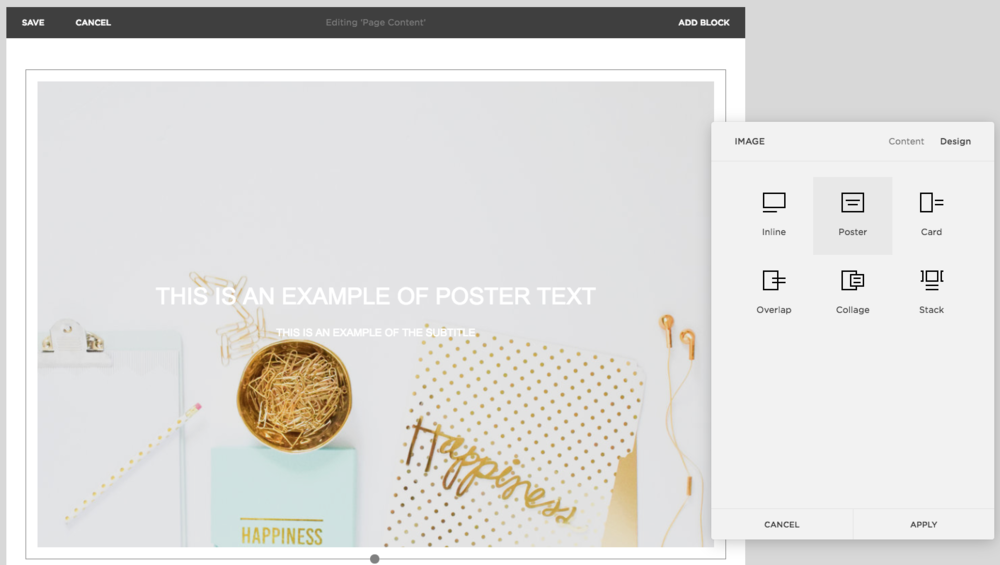
The poster option places an opacity layer over the image - that is the slightly grey look you can see in the example above. It then layers the text on top of the image. This could be great to use on a homepage as button tiles, placing three side my side. You can edit the overlay colour (or remove it entirely) and you can edit the text type, colours and position. We will go over the Style Editor in a moment.
THE CARD
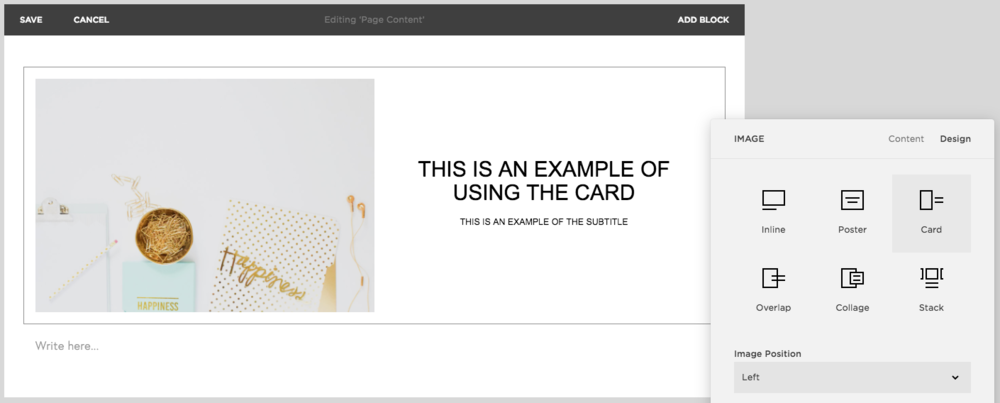
The card essentially places the image to one side and again automatically applies the overlay on the image. This can be removed in the Style Editor and the text appearance can be altered. I also love that you can select if the image will align to the left or right from the image block Design panel.
THE OVERLAP
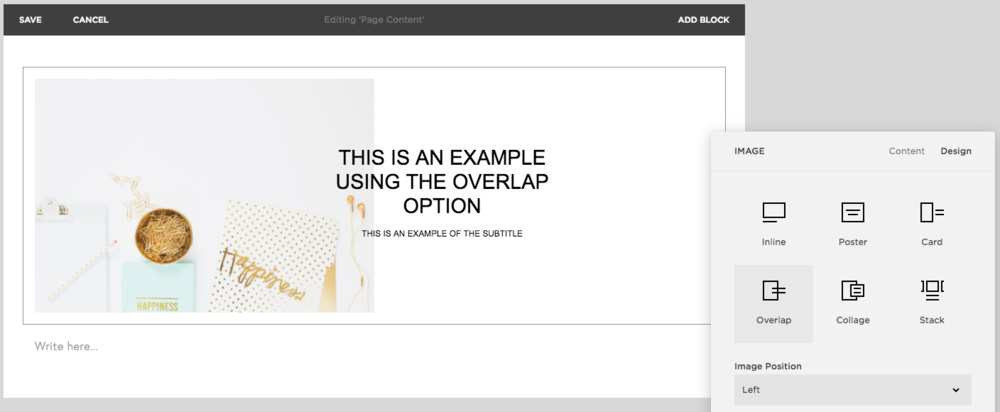
This is where things get super interesting (well I think this is exciting anyway!). You can also now add in overlapping text. Again you can change the image position to the left or right and essentially the text overlaps the image here. You can change the width of the text to make it cover more area rather than breaking over three lines like the example above. Being completely customisable makes this a really versatile image block option!
THE COLLAGE
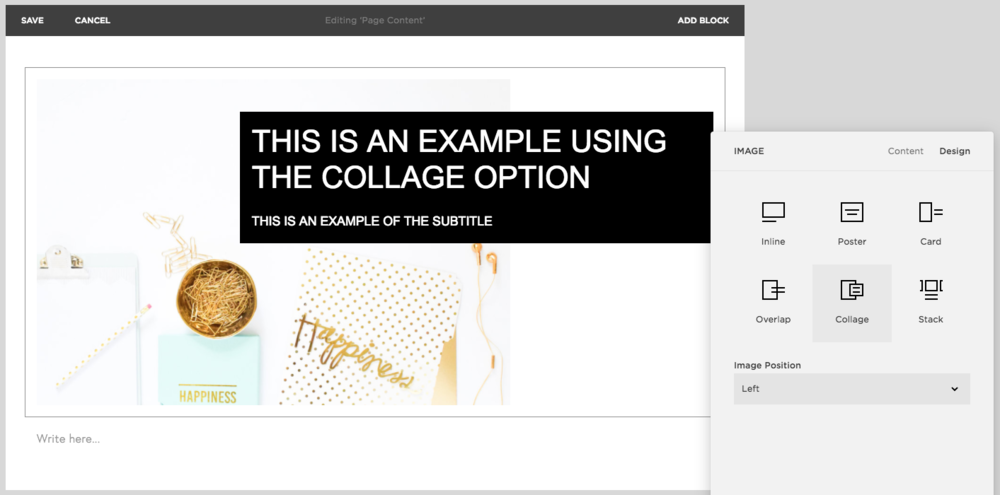
Ok, this is maybe my favourite addition to the image block library - the collage. This places a caption block over the image and off to the side with a background colour applied behind it. Again you can alter the image position and the colour and style of the text is completely customisable. I can't wait to see what people do with this one!
THE STACK
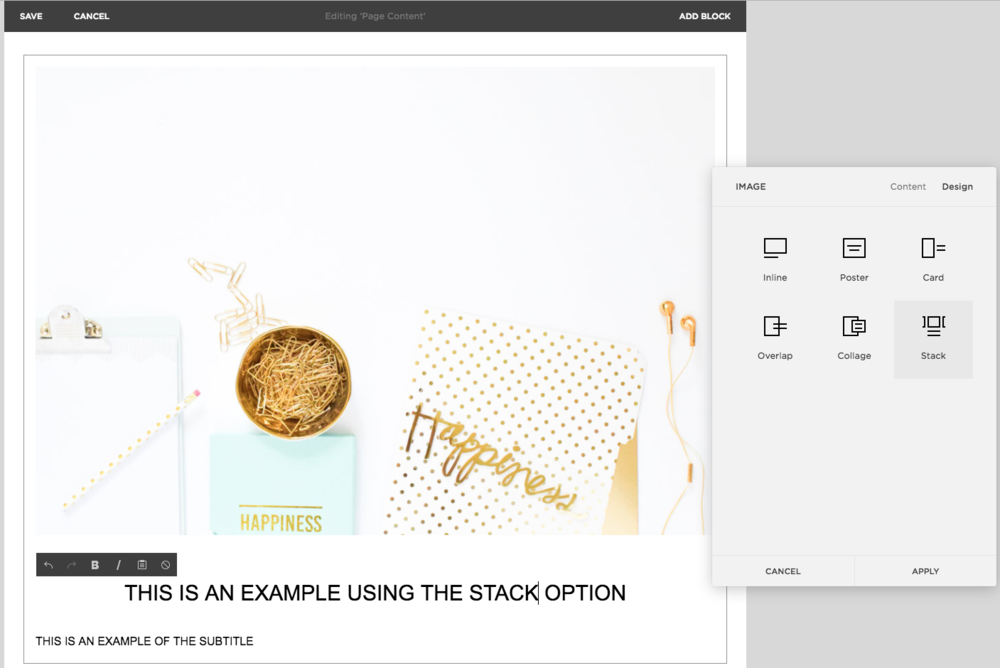
In my opinion this is the least exciting addition - I feel like this was an easy enough look to achieve before the update, however it's there and makes it quicker to create the stacked image with text effect. Again, everything is editable and customisable in the Style Editor.
HOW DO YOU CUSTOMISE USING THE STYLE EDITOR?
The great thing about the new image block options is that you can customise the way that they look using the Style Editor. To access the Style Editor simply go to your Squarespace dashboard and navigate to Design > Style Editor > and the press on the element you want to edit. So in this case it will be the image block.
Now remember when you apply the customisations to one image block, all image blocks of the same kind will look the same. To make them look different, you'll need an advanced customisation and that will require a designer!
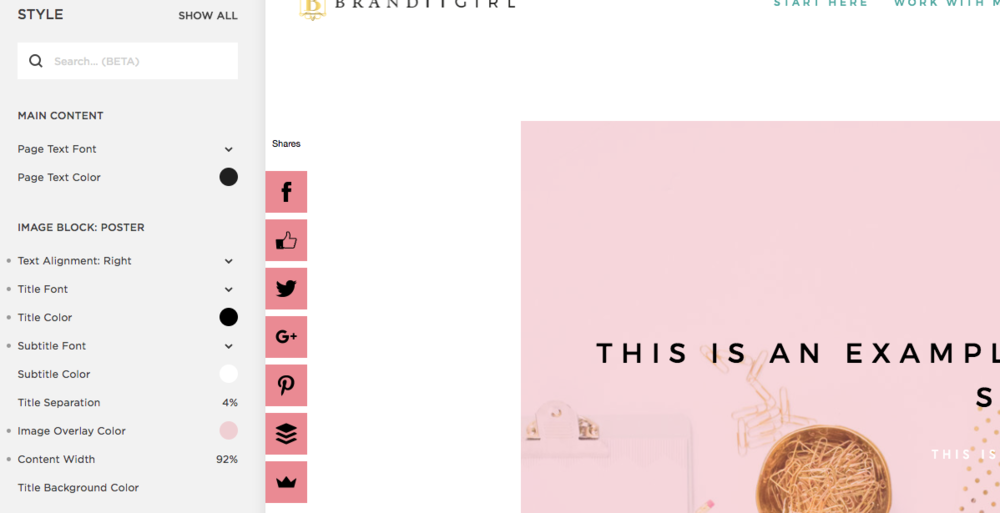
In this example above, you can see what it will look like inside the Style Editor when you are changing the appearance of an image block - in this case, the Poster option. With some small changes, you can not only ensure your image block appearance is on brand, but also radically different than the default option!
Enjoy playing with your new image block options and if you discover anything else about them, please don't hesitate to let me know in the comments and share your link!